About the hips
Pay attention to how much we sit during the day and how little we move. This is due to the specific nature of modern professions. Certainly there are people who stand on their feet a lot during the day, but today we are talking about the world of sedentary professions and people who pay little attention to their health. Unfortunately this attitude has unfortunate consequences and even if a person suddenly decides to do sports and, for example, goes out for a jog, they start having serious problems with their lower back and knees.
As a rule, knees and lower back do not hurt on their own. In the case of knees, the cause is usually in the ankle and hip joints, and in the case of the lower back, it is either a decrease in rotation in the thoracic region or mobility again in the hip joints.
So today I suggest you shake up your hip joints a little bit and thus significantly improve your well-being. Functioning mobile joints affect your lower back, gluteus volume, pelvic floor health and the articulation of your spine.
We’ll be moving on three planes, which will increase your freedom of body control.
1. Exercise – Bridge
Starting position is lying on your back. Legs bent at the knees, feet on the floor. Arms are pulled out to the sides and are pressed with palms to the floor. Feel good support in the sacrum and lower rib area. Feet are ‘buried’ in the floor, as if in warm soft sand. Jaws relaxed. Gaze is directed towards the ceiling.
Bend your pelvis. As you inhale bend your pelvis forward, arching your lower back. As you exhale, tilt your pelvis back, pushing the lower back against the floor.
Then as you exhale, lift your pelvis up off the floor, vertebrae by vertebrae. Stretch out behind the knees and straddle the hips. Breathe in and as you exhale lay vertebrae by vertebrae on the floor, returning to the starting position.
Lift up to the lower edge of the shoulder blades. Ribs “pointing into the pelvis”. Do not squeeze the buttocks. Try to open the clavicles. Move smoothly, taking your time. Don’t lose the feeling of support in the feet.
2. Exercise – Bent knee opening (knees lying on your back).
Starting position is lying on your back. Legs are bent at the knees, feet stand on the floor. Hands pulled out to the sides and pressed with palms to the floor.
As you inhale drop each knee in turn to the floor, with the other knee pointing to the ceiling. As you exhale return to the starting position.
Move in a comfortable amplitude, with the pelvis in a fixed position.
Feel the pressure on the sacrum, back of the head and lower ribs. Breathe through nose.
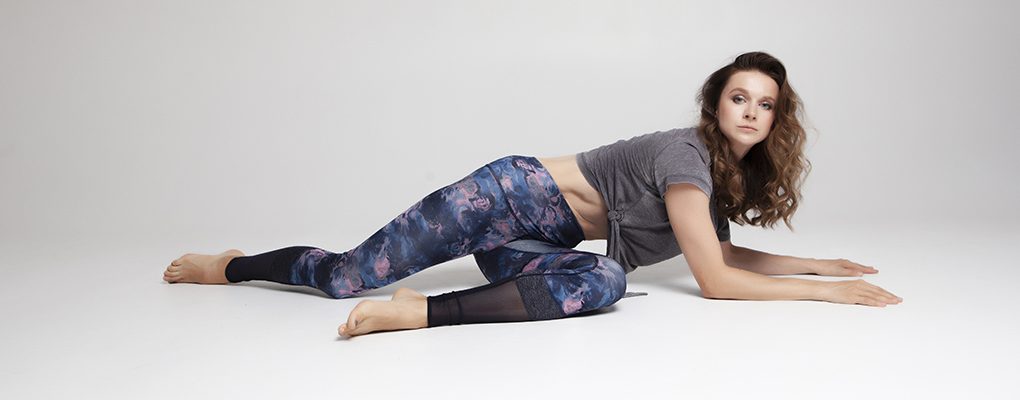
3. Exercise – Abduction of the leg lying on the side
Important points:
Starting position is lying on your right side. Legs are bent at 90° in the knees or slightly more. One arm is placed underneath the head as a cushion. With the other hand rest it on the floor at chest level. The pelvis, chest and head are lined up.
On an inhale, lift the left leg up to hip level, pressing the right leg well into the floor.
As you inhale bring the left leg back. Move the leg in a plane parallel to the floor. The angle between the thigh and the lower leg remains unchanged.
Then keep the left leg raised to the level of the hip joint and move the left foot up and down, keeping the thigh parallel to the floor.
Keep your jaw and lips unclenched. Keep the pelvis stable, don’t rock.
Repeat exercise on the other side.
5. Exercise “Arches with legs in the “Bridge” position
Starting position is on the back in the “Bridge” position. Legs are bent at the knees, feet rest on the floor. Pelvis is raised off the floor. Hands pulled out to the sides and pressed to the floor, palms down.
As you do this, on an inhale lift each foot in turn above the floor. As you exhale lower your foot to the floor.
Don’t drop the pelvis down. Ribs “pointing into pelvis. The sternum is soft. Do not bend too much in the lower back. The eyes are directed upwards.
6. Exercise – Knee pulling forward on all fours
Important moments:
Starting position is standing on all fours. Arms are slightly forward. Palms slightly wider than shoulder joints. Pelvis is slightly pulled back.
As you breathe in, take each knee out, one at a time, bending the opposite leg fully at the hip joint.
When moving forward, stretch your chest well. Stretch the mat out to the sides with your palms. Move slowly in a comfortable amplitude.
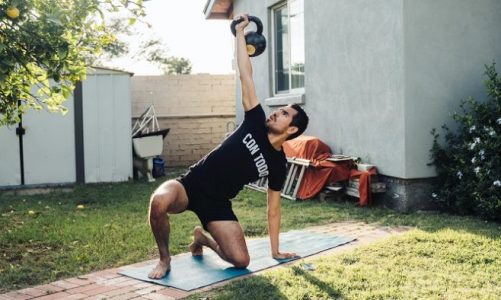
7. Exercise – pelvic translation while standing on one knee
Starting position is standing on the left knee. The angle between your shins and thighs is 90 degrees. The pelvis is slightly tilted forward.
Do the exercise in the following order. Rock back and forth, being careful not to strain the buttock of the supporting leg. As you inhale move your pelvis forward, while lifting your arms up over your head. Completely straighten the hip joint of the left supporting leg.
In the starting position right knee is diagonally at 45 degrees. Arms are stretched vertically upwards above head. As you inhale move the pelvis to the right, while bending to the left side.
Move strictly in one plane, as if you are between two walls.
Initial position is right knee turned to the right at 90 degrees. Move pelvis to the right and return to starting position.
In the starting position right knee turned to the right at 90°, arms stretched out diagonally to the sides at chest level. As you inhale move your pelvis to the right, moving your arms to the left. As you exhale return to the starting position, taking the arms to the right.
In the starting position the right knee is to the front. Right arm stretched up.
Bend forward, palm down on the floor with your left hand next to your right foot. Looking upwards towards the right palm. You exhale return to the starting position.
In the starting position, right knee is pointing straight ahead. As you inhale, bend forward, placing left palm on the floor next to right foot and pulling right hand up. Look up at the right palm. As you exhale straighten, turn to the left and pull your arms out to the sides parallel to the floor.
Breathe through your nose. Move in a comfortable amplitude.
Repeat the exercise on the other side.